Showing posts with label DIY. Show all posts

Wednesday, January 7, 2015

Children's Book Baby Block DIY


I am so excited to share this tutorial because a lot of people I know are having babies or have already had babies. This is such a cute project to do as a gift or for your own child. Aren't these baby blocks so adorable?! I love how they turned out!! So back when I threw Kallie a baby shower, we made some baby blocks for Karson. I had a table set up with used children's books, paint, and wooden blocks to create some cute blocks for Karson. However, in the amount of time we had, we didn't finish a lot of them. So I decided with the left over supplies I would make blocks for my adorable nephew (I threw in a picture of him at the bottom). This is a great DIY project that you can personalize for a baby shower, birthday or Christmas gift.


Supplies
- Used Children's Book- Check out goodwill and second hand book shops. You are cutting these books up so you don't want to buy new. I used multiple DR. Seuss books, Where the Wild Things Are and Chicka Chicka Boom Boom
-Wooden blocks- I got mine from Michaels and these get expensive when your buying a lot of them (use a coupon).
- A variety of NON-TOXIC acrylic paints - This is really important. These are baby blocks and babys put everything in their mouths so please get NON-TOXIC paint. Martha Stewart paint it what I used.
- NON-TOXIC Glue- I used Martha Stewart Matte glue.
- Sand Paper
- Paint brush
- Scissors
- Card Stock paper


Tutorial

- Start off by lightly sanding the wooden blocks so that the paint will stay. Then just wipe each block after with a towel.
-Use a block as a guide to make a couple of card stock square cutout patterns.
- Paint each block with vibrant colors. You only need the sides painted so I just did the edges of the blocks. Of course, make sure each side is dry before you start painting on a different side of the same block.
-While the paint is drying you can look through your books and find your favorite parts to cutout. Using your card stock pattern, test your favorite places in the books to make sure it will fit on your block square. You want to make sure that the image is small enough for the block so you can tell what it is. 
- Trace the area in the book with the card stock pattern square and then cutout multiple squares in your books to glue to your blocks. 
- Organize your cutouts in a pile according to how you want your blocks to be. For instance, I chose to cutout Karson's name using the Chicka Chicka Boom Boom book. Then I chose to place a letter from Karson's name on each block and then stuck with using either a DR Seuss or Where the Wild things are theme. I did not mix the DR Seuss and the Where the Wild Things books together on the same wooden block (I hope that makes sense). However, the blocks are your creation and you should do whatever kind of theme you want. If you want to place different children's books on each block and mix them then go right ahead.
-Next glue down your cutout book squares to your blocks with your nontoxic glue. Allow sides to dry before gluing on the same block. You don't want to glue too soon and have your block stick to whatever surface your working on and ruin the book paper. 
- After all sides are glued down then place a thin coat of glue over each surface to cover and make sure the paper is well protected. 
 -Allow blocks to dry.


I do not have a dedicated work space for my crafts/painting projects. So I just take old towels (which I now call my crafting towels) down to protect whatever surface I work on.


So here are some pictures of the different sides of each block.


I have to throw in a picture of my adorable nephew!! This picture was taken over Thanksgiving, but it is one of my favorites. He is so completely precious and I am so in love with this little fellow!!

Sunday, December 22, 2013

DIY Harry Potter Inspired Etched Glasses

So before I went to Scotland I made my sister some custom glasses. Since she loves Harry Potter I thought it would be cool to make her some glasses with different drinks/potions. So I wrote down some ideas of drinks/potions to put on the glasses. Then I tried to match them up to the style of glass.

For instance, the ones I made were....
Polyjuice Potion - Goblet glass or red wine glass
Butterbeer - Beer mug
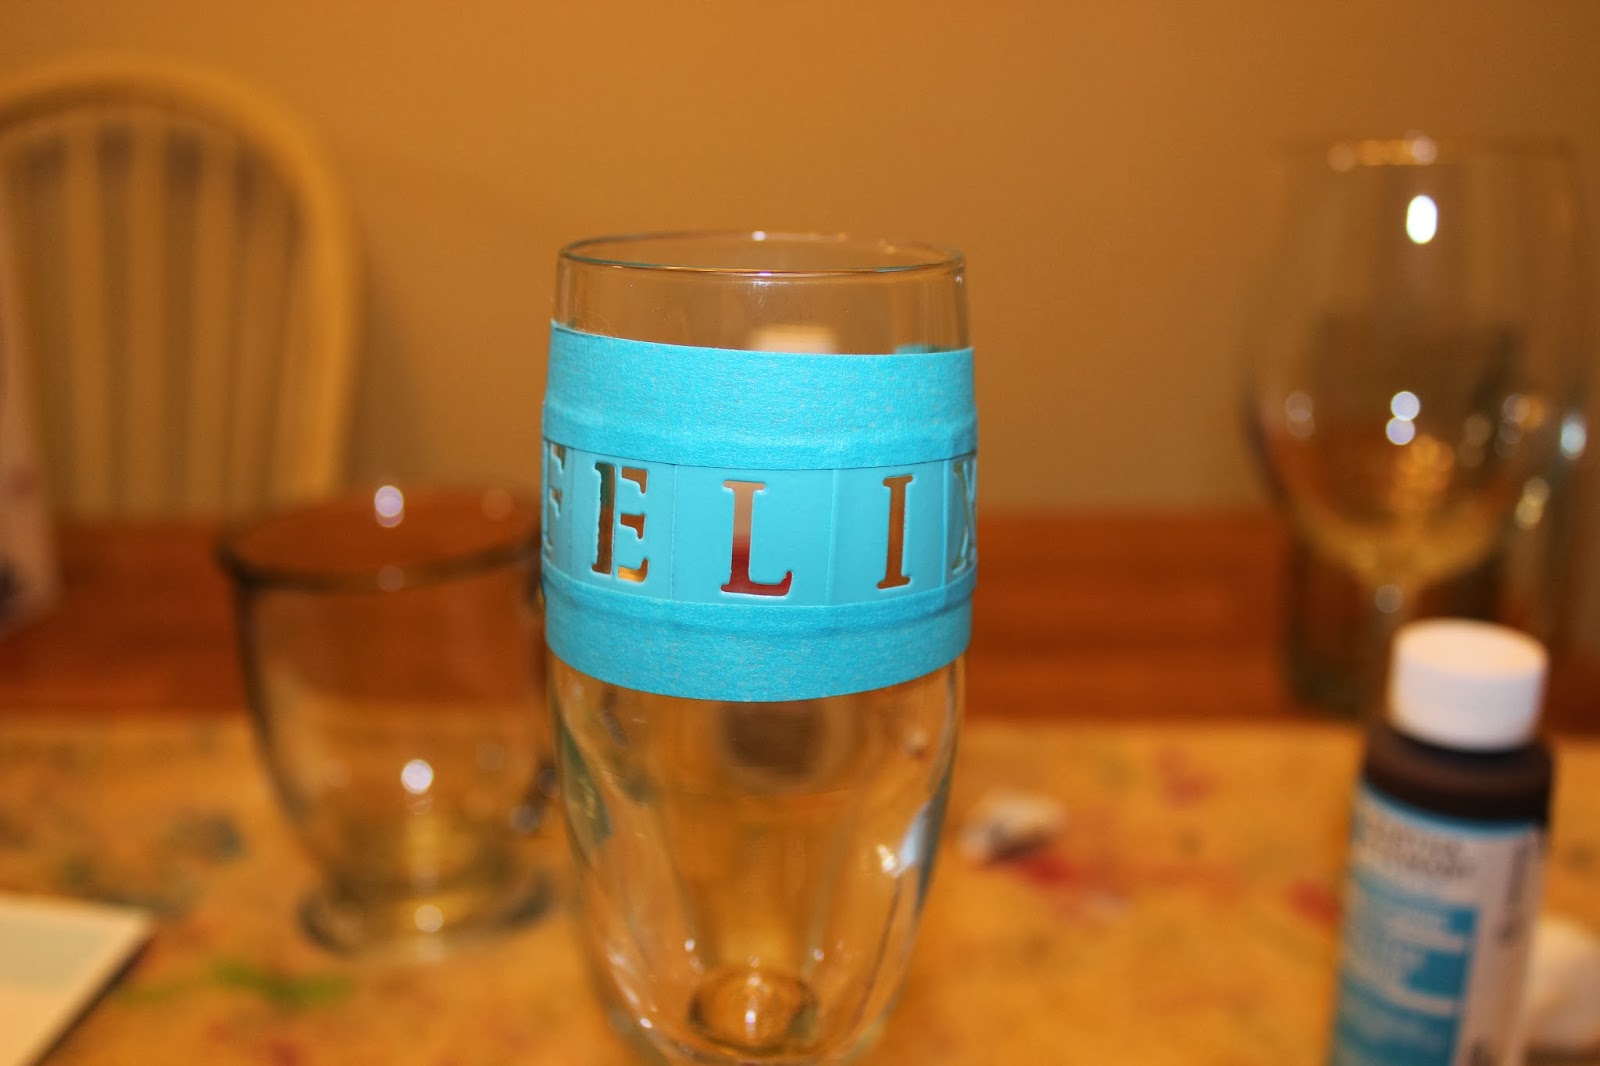
Felix Felicis - Champagne glass
Also, I thought Accio Coffee was cute so I did one of those in a coffee mug of course..
Other ideas - Veritaserum, Pumpkin Juice, Fire Whiskey (shot glass or whiskey glass), Amortentia, Elixir of Life, and Mead are some others.

Etching glass is so easy!! Even if your not a crafty person you can do this! Once you buy all the supplies you can custom anything that is glass. It is perfect for gifts and if you need last minute Christmas gifts this is perfect! Also, I want to say I tried to take good pictures of the glasses, but it was hard because I was just learning my camera! So please figure me.


  Supplies
 A variety of glasses - I got mine from walmart, bed bath and beyond and home goods
Etching Cream - Michaels (tip bring a coupon the stuff is kind of expensive)
Paint brush
Martha Stewart Vinyl stick-on letters - Michaels (use a coupon) 
Painter's tape 
Alcohol and Cotton balls 
Old towel - I have crafting towels that have tons of paint on them. 
 Gloves
 

Instructions
- Wash all your glasses and dry them. Next place alcohol on a cotton ball and rub down the area you will place letters.
 
 - Add the vinyl letters onto glass ensuring they are stuck on the glass entirely to avoid any smudges. Add tape around the letters to keep from getting cream anywhere else.

 - Read and follow the directions on the etching cream.
-Use gloves when apply the etching cream and apply a thick layer of cream with a paint brush.

  
- Rinse after 15 minutes of allowing the cream to set (this is how long my directions said to allow to set. Make sure to follow what the directions on your etching cream)
-Hint check the etching before removing the stencil because sometimes it won't look even and there will be some spots you might have missed.You can tell because the etched glass has a frosted appearance so you want that to be even in your letters. Its easier just to reapply the cream vs trying to reline up the stencil with the already etched letters .


 Accio Coffee

Butterbeer

 Polyjuice Potion

I bubble wrapped them to bring them on the plane.


Tuesday, September 24, 2013

Painted Envelope Throw Pillow Cover DIY

I have been searching for some affordable throw pillows and MAN I had no idea how expensive decor pillows are! I decided to try and make some myself. I am not an experienced sewer by any means. I searched the internet for an easy throw pillow tutorial. I wanted to make pillow covers, but I have never worked with zippers in my sewing experience. I ended up stumbling upon an envelope pillow tutorial and it is so simple! If you know the basics of how to sew you got this!! I found this tutorial via pinterest. The great thing about this is you can buy your pillow forms and then make a bunch of different pillow covers to switch out. So you never get bored with your covers! Here are the 2 pillows I have made so far and I am definitely making more. My pillows covers are made to fit a 18x18 pillow form.


So since Sparkle Power has such great instructions on how to make the pillows covers I am not going to go into details about the sewing part. However, I am going to explain how I painted my "And in that moment I swear we were infinite" pillow.

Supplies (for the painting not the sewing part)
Soft fabric paint or Acrylic paint mixed with fabric medium (I prefer the soft paint)
Soft Canvas fabric - I got mine from Joanns
Paint brush
Stencils for the letters
Ruler
Scissors
Cutting mat and rotary cutter ( optional) This project can be done without this, but I felt it was something that I wanted to invest in. I bought mine from Joanns and it is a 25x36 mat. I suggest using 2 coupons when purchasing this (I saved like 40$ that way)

1. First pre-wash and dry your fabric
2. Next iron your fabric and then cut the fabric to the size of your pillow. I cut my fabric 19x19 for a 18x18 pillow form. However, it ended up not being a snug as I wanted it. If you want your pillow to look a little more fluffy then you can cut it right to size 18x18.
3. Get your painting station together. I just put a old towel down so the paint wouldn't get on my table.
4. Figure out what kind of pattern you want as your background. You can use stencils or free hand it. I chose triangles and circles for my pattern. I used gold as my background color! Once you have painted your background color, allow the paint to dry.


5. Next paint your quote! I wanted to use one of my favorite quotes from perks of being a wallflower. I used stencils for this part. I used my ruler to make sure the letters were straight and then painted them on my pillow. After stenciling the letters, a touch up on paint might be required. Sorry my pictures are not super straight but you get the idea, I hope. Also, sorry for some of the lighting issues I took some of these with my Iphone and others with my camera (I need to invest in a new camera)


6. After your done with your design allow paint to dry for at least 4 hours before sewing up your pillow cover.
7. Again the instructions I used on how to sew the pillow cover is at Sparkle Power.


Below is a image of my big "Mess up" that turned out okay in the end.

I wanted to tell you about my mistake I made in the process of making my pillow. When stenciling my quote for the first time instead of putting "And in that moment I swear we were infinite" I put "And in that moment I swear we we infinite". I was devastated at first because I thought it wasn't fixable.  However, that is why there is black paint with gold letters for "were infinite". I actually like the black painted rectangles with the gold letters. It makes those words stand out! I am so glad I didn't throw it out and start over. 

Saturday, August 10, 2013

Pretty washi magnet bookmarks DIY


SO I have been obsessed with making these lately! These bookmarks are so easy to make and cute. I have been searching for a DIY bookmark tutorial on pinterest and found an awesome one at lemonsqueezyhome blog, which I adapted this from. I followed the steps on lemonsqueezyhome to make mine, but played around with lengths and width of my bookmarks. I wanted to be able to use a variety of patterns for mine.I think these would be a cute gift ideas and you could personalize them too. My favorite is "Have a sweet read."

Supplies
Washi Tape - I ordered mine off Etsy at 2 shops TheWashiShop and pikwahchan
Adhesion magnet sheets - Bought from Michaels
scissors
Construction paper - You want your paper to be slightly sturdy, but not too heavy. If the paper is to flimsy the bookmarks are hard to separate apart and are just annoying. If its too heavy then the magnets won't hold.
Sharpie and/or paint

Tutorial
1. Cut your paper to the desired width and length you want your bookmark. I played around with different lengths. I think the smaller bookmarks made with just one tape are good for bookmarking multiple things in one book. Like for instance, bookmarking in textbooks, passages in the bible and other inspirational books. I like the bigger bookmarks for marking one spot in a book. 
2. Use your washi tape and cover the cut paper along the length and cut the excess tape. Make sure you cover the back and front of the paper. Also, be sure to line up the tape with its match on the other side. Smooth out any bubbles in the tape.After you use the desired colors for tape, if there is still paper showing for your bookmark just trim the paper.
3. Fold the cover paper in 1/2 hamburger style. 
4. Cut out 2 magnet pieces almost the width of your bookmark.


5. Peel off sticker of adhesion magnet sheets and place on the ends of the bookmark. Place magnets on the side of the bookmark that has the most flaws. If magnets are not sticking well with adhesion to the bookmark then just use a little mod modge or glue to keep them from coming off.

 
Add any cute design with a sharpie or acrylic paint to your bookmark. This is optional you don't have to add any design. Its nice to add a cute saying/fav quote or design to know what page you actually left off on.


Here is a short instagram video I made for a tutorial. It is condensed because instagram only allows you a short time. Also, FYI I made a mistake and said use contact paper, which I meant to say construction paper. Please don't go buy contact paper for this project alone it is not needed. :)


Sunday, April 14, 2013

Bleach pen DIY


There are so many bleach pen tutorials on pinterest. I thought I would attempt it because I really wanted a shirt that says "and in that moment I swear we were infinite". I used the tutorial from somethingturquoise. I thought mine turned out pretty good especially for me not having the best handwriting.

Supplies
T- shirt/tank top - any darker color shirt ( I got mine from walmart)
Bleach pen
white color pencil (for sketching)
wax paper
storage plastic tub top OR cardboard (this is just to keep the bleach from bleeding through the other side of the shirt)


I thought really hard about what I wanted to sketch from my shirt. This is one of my fav quotes so of course I want it on a T-shirt!!
First step is to sketch your drawing first with a white color pencil. You also can free style if you want to, but I don't have the best handwriting as I stated before so sketching works best for me.


FYI shake your pen before using the first time. As you can see the A in AND bled more because I didn't shake it and a lot of liquid came out then the gel. OH well though imperfection is beauty right... it gives my shirt character. After shaking your pen just go over the color pencil with bleach pen. Leave the bleach on for at least 10 minutes. If it is a thick shirt then you might want to leave on longer.

The gel hardens a little so the next step is to rinse the gel off with a water. Make sure there is pretty good pressure in your stream of water. You don't want to rub the gel onto other areas of the shirt. After all the gel is off. Rinse the shirt with soap and water to make sure all the bleach is off. I used dawn soap and it worked fine. Next I just machine washed both of the shirts I made.


Harry potter inspired shirt. I love how the designed ended up coming out!


Saturday, December 15, 2012

DIY pocket sweatshirts

So my new obsession is pocket sweatshirts. I have to give somewhat credit to my sister. My sister a while back showed me this on pinterest and was like we could make these. Unfortunely since we live 9hrs away from each other we were not able to make them together, but one day we will. Anyways you can get a Hanes sweatshirt from Walmart for 6$ and turn it into a fun hipster sweatshirt!. I have been making these non stop. They are perfect for a xmas gifts and you can even make some holiday inspired ones. I have very little sewing experience and was able to do this project no problem.!!


Supplies
Fabric -fat quarters are great! Tribal fabric obtained from Sweetlamas Etsy
sewing machine
scissors
pocket template (I used this one and then copied to word resized it to a little more the 4 1/2 inches wide by 5 inches tall)
card stock ( for pocket template easier than paper for cutting the fabric)
Hanes sweatshirt (walmart)
Pins
Iron


If your a visual person like me and like youtube videos here is a perfect simple tutorial!
I used this DIY POCKET VIDEO as a starting point. This video is for making pocket tees but same concept implies to sweatshirt.


Steps! 1. Make your pocket template. Like I said above I used this pocket template and then copied to word resized it to a little more the 4 1/2 inches wide by 5 inches tall. This a guide you can make your pocket however big or small you like. Rememeber from video you will fold over part of fabric to keep it from fraying. I printed the image and then traced it to my cardstock, which I then cut. If you dont have cardstock the paper will work, but the cardstock is heavier and will last longer for future projects. 2. Pick your fabric and then use cardstock template and cut out pocket shape from fabric. 3. Fold crease in the top half of your pocket, iron it down and then sew a straight stitch (in the video it says no backstitch needed for this but I did it anyways). Make sure the side you fold and iron down is the backside of the fabric. 4. Then fold the reminder of the sides of the pocket to keep from fraying, iron down and then stitch (I used back stitch for this as well)
 
Back side                                                                                          Front side
5. Put on your sweatshirt and pin the pocket to the area you want your pocket. Like so.. be careful not to poke yourself especially when taking it off.
 
 
6. Iron pocket in place and then sew pocket in place. I usually start on the left side first and slowly sew using a straight stitch backstitch at the beginning and end!!  Don't sew the top line of the pocket.
 
Heres all the lovely sweatshirts!! I will be making more!


Thursday, December 29, 2011

DIY earrings and necklace

Here is a fun DIY jewelry project finally! 2 colors geometric necklace. Sorry it took so long!


Supplies


Steps


1.Kneed the clay so its more manageable. Flat the clay out pretty thin, if its too thick the triangles will not look right laying over each other. However, if the clay is too thin it will break. I used my mod podge bottle as a rolling pin!
2. Next cut the rolled clay in 1/2 like the picture above shows in image 2.
3. Next use your knife and cut a shape of a triangle from the 1/2 clay piece. I placed the cut egde of the clay piece down to form the bottom of the triangle and then cut the sides.

I used black and gold clay. The black triangle is bigger than the gold one. Make sure one of your triangles is bigger than the other. Make another set of triangles that are identical to the first 2 triangles. Then make another 2 triangles for the necklace. I made my black triangle and my gold triangles bigger because I wanted my necklace to be bigger than my earrings. In all you should have 6 triangles.
4. Pour gold glitter on the gold triangles and black glitter on the black triangles. Cover entirely!! Then shake off excess glitter carefully without distorting the clay.


5. Next take a toothpick and poke holes in your biggest triangles in the corners. My biggest triangles were my black ones so those are the ones I did. Dont poke holes in the gold triangles.

6. Place all of your triangles on some aluminum foil and bake the earrings at 275 degrees for about 15 mins. Remove the clay and let cool. Once cool take your goop and glue the gold triangles onto the black ones. Allow to set for a couple of hours. Goop holds really well but only if you let it set.


7. Once set take your jump rings and pry them open (jewelry tool could come in handy, but I managed without) and place them in the holes in the black triangle then take your chain out. I wanted dangling earring so I used about a total of 41 links. This is the tricky part because your links have to be even, but its a odd number links because the hook finding has to be attached to one. You don't want one side of your earring to be lopsided or not even ( I hope this make sense).


 I used regular scissors to cut the chain. Attach your chain within the jump rings and close the jump rings tightly. Then add your hook findings directly in the center of the chain. Repeat for other pair of earring making sure the chain is the exact length as the first. You also dont want one of the earring longer than the other. Repeat same steps for the necklace, however of course you will use more chains. The same concept applies make sure your necklace is even on both sides of the chain. I made mine long enough that I can just put over my head, but you could add a chain fastener if needed.

Heres there earrings on.

Heres the necklaces